Modelling The Hog's new companion
- Simon Eccles

- Jun 5, 2023
- 3 min read
Updated: Oct 6, 2023

At the Wendover Shed committee meeting in mid-May committee member Dave Walls brought along a model of the planned Outdoor Space that will be built along the front of The Hog, more than doubling the available working area.
In future Dave hopes to digitise the shape of The Hog itself and print it at the same scale, to show how everything will go together. This could be useful at open days and any shows and fairs that Wendover Shed attends to raise interest and hopefully recruit new members.
Apart from providing a tangible preview of what the Outdoor Space will look like, Dave’s model is a good example of 3D printing in action. This is relatively new technology that many people will heard about, but some might not realise the sort of things it can be used for.
The Wendover Shed “Outdoor Space” is going to be an open wooden structure with a clear polycarbonate roof, which will be partly covered by a row of solar panels. It has a pent roof that slopes down towards the Hog container, partly to align the solar panels towards the track of the sun and partly to give a more open aspect looking out.

Dave's Photoshop rendering of his 3D CAD design into a real photograph
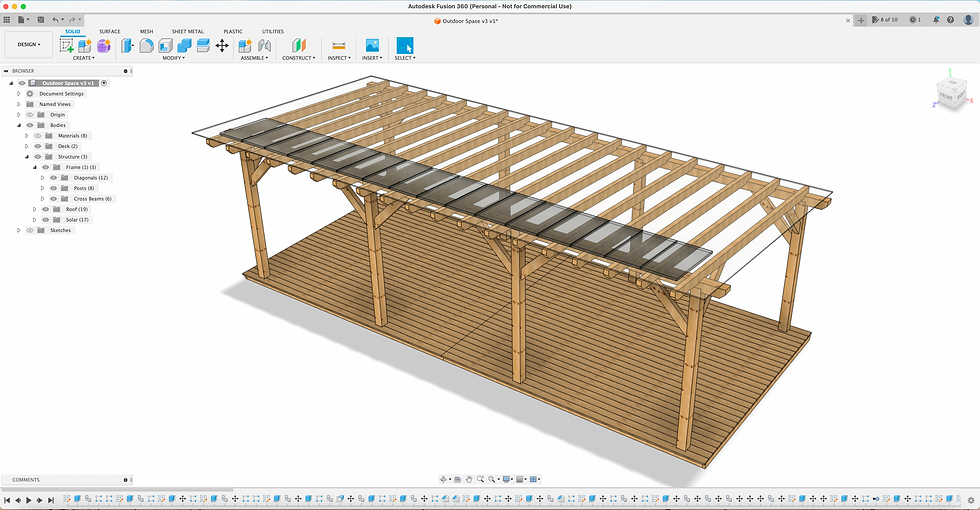
The structure of the Outdoor Space was was set up as a full-sized 3D CAD creation, which Dave can use to read off measurements for the timbers and other materials needed. The 3D printed model uses the same design file, but output at 1/50th scale in plastic, then painted.

Dave's 3D CAD design in Autodesk Fusion360
Dave designs in Autodesk Fusion360, a sophisticated 3D CAD application that’s hosted in the cloud, ie it doesn't run on your own local computer. This is free for personal use, but takes quite a bit of learning.

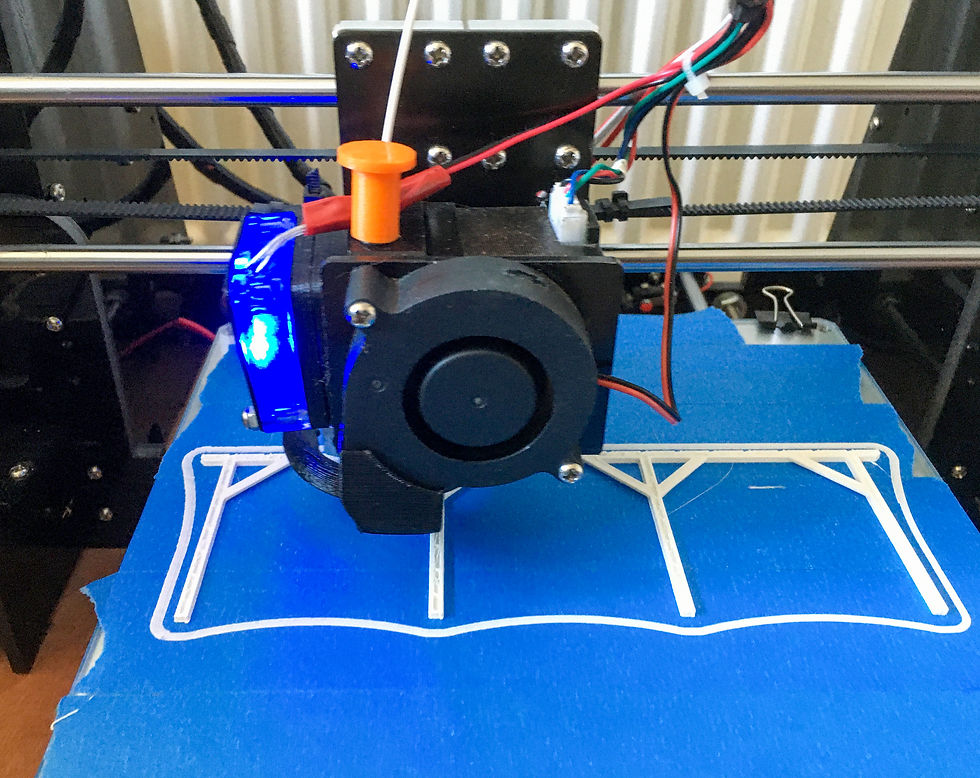
Dave's 3D printer working on the beams for the Outdoor space.
He has been using Fusion360 for some time to create 3D CAD files that he can output on his own 3D printer, an EarMe Anet 8a model, which came as a kit that he’s modified to work better, such as modifying the bed levelling mechanism for easier adjustment. The Anet is a fused filament fabrication type, which uses reels of plastic filament to create printed items. This replaced Dave’s original RepRap kit.
For anyone unfamiliar with 3D printers, fused filament is one of the most common types, and works by feeding a thin plastic or starch-based filament into a heated nozzle on a head where it is melted and deposited layer by layer on a support bed. The nozzle head moves in the XY (left-right, front-back) directions to create 2D layers. After each layer the nozzle head is raised a little (ie in the up-down Z direction) and the next layer is deposited.

Printing the side beams for the Outdoor Space.
Pretty well any shape can be created, including some that are impossible by conventional machining or casting. If overhangs or disconnects are needed this is a little trickier, so these have to be supported during printing by sacrificial struts, which some design apps will calculate automatically. Some printers can create supports from a separately fed filament material that’s easy to remove afterwards – in some cases it dissolves in hot water.
To create the Outdoor Space design, Dave started by setting up a grid of beams and joists for the timber floor layer, and then creating timber uprights to support the roof. Horizontal roof supports were then added, and diagonal “gallows struts” added between these and the uprights. The details of how to notch and join the timbers could be worked out at this stage.
The clear roof was also added, though in the model this is just a clear sheet of thin plastic cut to size rather than printed.
Dave says that designing the shed in 3D CAD has let him experiment with the best way of creating joints that will bear load without weakening the horizontals. He’s also done some vital on-the-spot research of similar structures, which purely coincidentally happen to be at local pubs! By Simon Eccles


Comments